



Just saying the word muddler is fun, but making cocktails that require muddling are even more fun! I’m talking Mojitos, Caipirinha, Mint Juleps, sometimes even the Old-fashioned. Time to pick the perfect muddler for you!

Most muddlers sold as “professional grade” are too long for a rocks glass and too aggressive for mint. That mismatch, not a lack of muscle, is why so many home mojitos taste bitter and so many mint juleps taste like grass clippings.
A muddler’s only job is releasing oils and juice without shredding the ingredient. Get the tool and the technique right, and a $10 piece of wood outperforms almost anything with a fancier finish.
What a Muddler Is For (and What It Isn’t)
What’s a muddler you may ask? Many compare it to the chef’s pestle without the mortar, but I think of it as the massage therapist of home bar tools.
If you’re looking to get every last essence and oil out of a fruit or an herb and into your cocktail, then the muddler is your tool. It’s all about the gentle, but firm, touch. It’s really easy to use and fun to whip out at a party to wow your guest. Think less “crush,” more “coax.”
This distinction matters because it decides which muddler you need. A drink built on delicate herbs (mojito, mint julep) wants a gentler tool and touch than one built on tougher fruit (an Old Fashioned with orange, a Caipirinha with whole lime wedges).
Where did the muddler come from?
Maybe not as much fun to say was toddy stick, the first generation of muddlers. An 18th C creation, the toddy stick was used to make, you guessed it, the hot toddy. It was the tool you needed to crush sugar or cinnamon or any spices, not then available in an easily pourable or shake-able form.
As cocktails became popular, the tool was used to crush even more sugar to make syrups, a crucial ingredient in early cocktail recipes. As drinks became more refined, so did bar equipment. The toddy stick morphed into the muddler we know now. It was no longer needed to crush ice and sugar, so its only extremely important use is for drawing out those wonderful fruit and herb essences in some of our favorite cocktails.
Wood, Stainless Steel, or Nylon: What Actually Differs
Wood is the classic choice and still the best all-rounder. It has enough grip to control delicate leaves and enough give that you’re less likely to crack a glass. The tradeoff is porosity: wood absorbs oils and juice, which means odor retention and eventual staining if you don’t dry it properly.
Here are a few different styles of wooden muddler I can recommend:


Cato Muddler (Inspired by David Wondrich’s private collection)

Stainless steel is dishwasher-safe and won’t hold onto smells, which is the main reason people switch to it. It’s also unforgiving. Steel conducts cold fast enough to sting bare hands on a long muddling session, and a heavy-handed twist against thin glassware is how rocks glasses crack.
Here are a few different styles I can recommend:
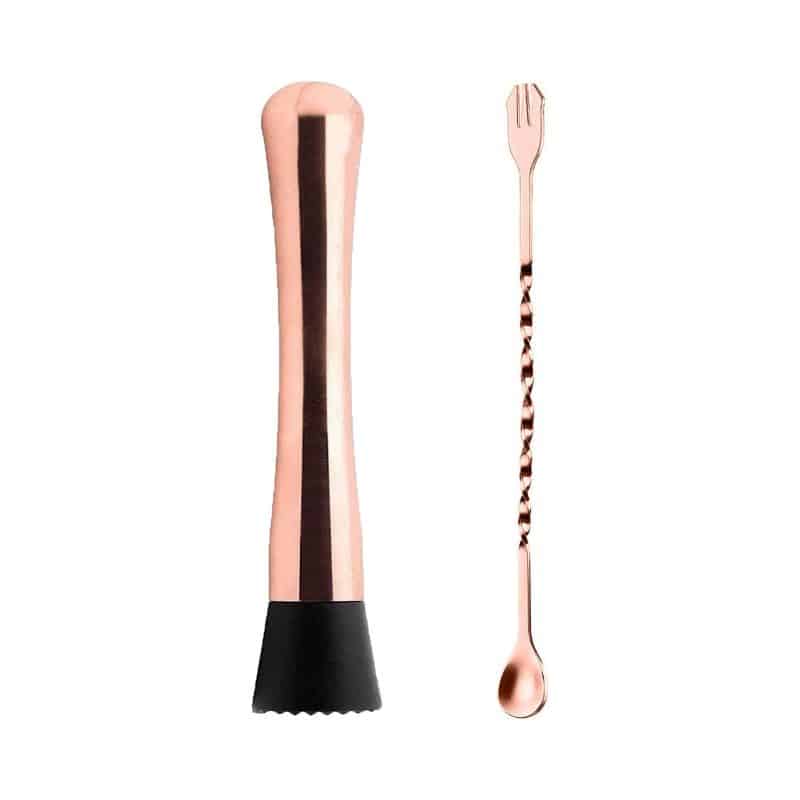
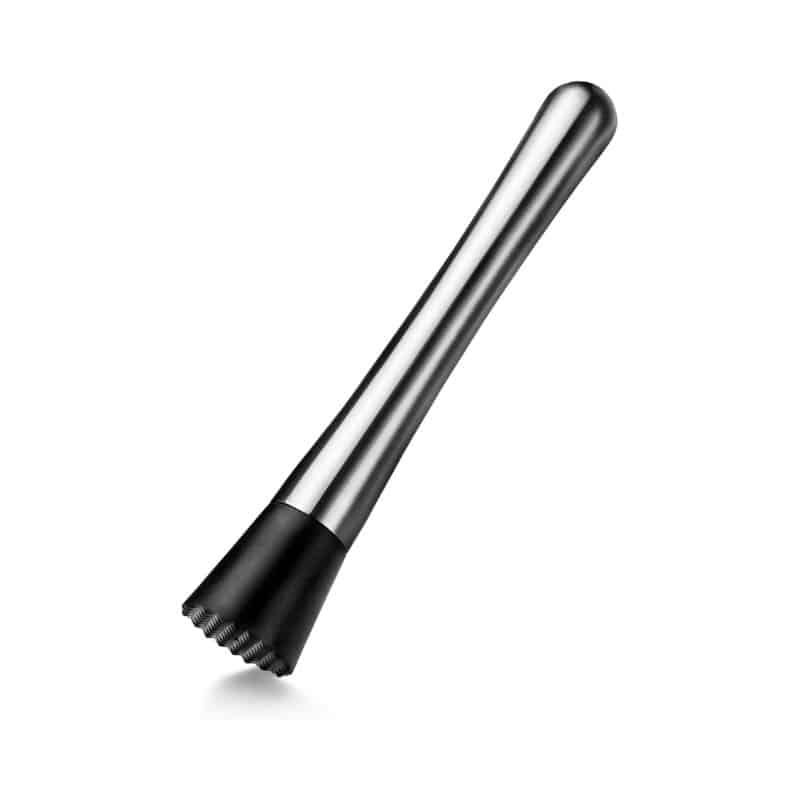

Nylon or plastic muddlers are the budget, low-stakes option. They won’t stain or crack glass, but the grip and control are noticeably worse, especially with mint, where a firmer, more precise touch matters.
If you only own one, wood is the safer default. If you’re outfitting a full home bar setup, one wood and one steel muddler covers nearly everything.
Picking the Right Size and Shape for Your Glass
A muddler that’s too long turns every stir into an awkward stab at the bottom of a short glass. Too short, and you’re hunched over a Collins glass with your knuckles nowhere near the ingredients.
- Rocks or Old Fashioned glass: a shorter muddler, roughly 6–7 inches, gives you better leverage and control.
- Collins or highball glass: go longer, 8–9 inches, so you’re not fighting the depth of the glass.
- Julep cup or metal cup cocktails: a muddler with a flat, wide head works best. It has more surface contact with mint without needing to press hard.
Head shape matters too. A flat-ended muddler is gentler and better suited to herbs. A muddler with teeth or a textured end grips citrus rind and pulp more aggressively, which is useful for a Caipirinha but overkill, and often destructive, for mint.
How to muddle
The first rule is take it slowly! Don’t go in there all gangbusters! It’s about easing the oil or essence out of the fruit or herb, not bashing them on their heads. You don’t want to get any of the bitterness of the peel or pith.
How to Muddle, Step by Step
- Add the ingredient first, then the sweetener. Sugar acts as light abrasion, helping release oils and juice without extra force.
- Press straight down, then twist once or twice. You’re not stirring or grinding. A single firm press-and-twist is usually enough for mint.
- Stop as soon as you smell it. With mint, the moment the aroma lifts off the glass, you’re done. Further muddling releases chlorophyll and bitterness, not more flavor.
- For citrus, press harder and hold longer. Limes and lemons need more extraction than herbs. Twist a few extra times to get the juice out of the pulp, not just the surface.
- Fill with ice after, not during. Muddling on top of ice cushions your pressure and makes it harder to gauge how much force you’re actually using.
The Mistakes That Actually Ruin the Drink
Over-muddling mint. This is the single most common issue and the reason so many mojitos and mint juleps taste bitter. Torn mint releases chlorophyll, which tastes grassy and sharp, not sweet and aromatic. Bruise, don’t shred.
Using a muddler that’s too long for the glass. This forces you to muddle at an angle instead of straight down, which concentrates pressure unevenly and is how glasses crack.
Skipping the sugar-first order. Muddling bare herbs against dry glass takes more force to get the same result, which usually means more damage to the leaves.
Ignoring the glass itself. Thin or cheap glassware cracks under a firm twist far more easily than it looks like it should. If you’re using delicate glassware, ease off the pressure or switch to a wooden muddler.
Muddler Care: Keeping Wood From Staining or Warping
Wood muddlers need a rinse and full air-dry after every use, standing upright rather than lying flat, so moisture doesn’t pool at one end and warp the wood. Skip the dishwasher entirely. Heat and prolonged soaking are what cause cracking and warping over time.
Staining is mostly cosmetic and comes from berries and mint oils sitting on the wood too long. A quick scrub with coarse salt and a lime half handles most residue, and an occasional light coat of food-safe mineral oil keeps the wood from drying out and cracking.
Steel and nylon muddlers are dishwasher-safe, but hand-washing steel immediately after use prevents the kind of water spotting that dulls the finish.
Muddler vs. Bar Spoon: Do You Need Both?
A bar spoon with a muddling disc on the end is a fine space-saver, but it’s a compromise tool. The disc is small and flat, which works for light citrus muddling but struggles with mint and doesn’t give you the leverage a full muddler does for a proper twist.
If you’re building out a proper setup, keep them separate: bar spoon for stirring and layering, dedicated muddler for extraction. If space or budget is the constraint, a combo tool is genuinely fine for occasional use.
FAQ
Can I muddle without a muddler? Yes, in a pinch. The back of a wooden spoon or a solid pestle can stand in, though you’ll have less control than with a purpose-built muddler, especially on mint.
Can you muddle citrus and berries the same way as mint? Not quite. Citrus and berries need more pressure and longer contact to extract juice, while mint needs a light touch to avoid bitterness. Adjust force to the ingredient, not habit.
What’s a good starting muddler if I only want one? A mid-length wooden muddler, around 8 inches, with a flat head. It handles mint gently enough and has enough surface area for citrus when you need it.